Assembly Instructions

- comma 3X
- right-angle OBD-C cable (1.5 ft)
- 2 mounts

- comma body kit (base, rails, and hardware)
- 29.4V 2A charger
- USB-C 6.6ft 90 deg cable
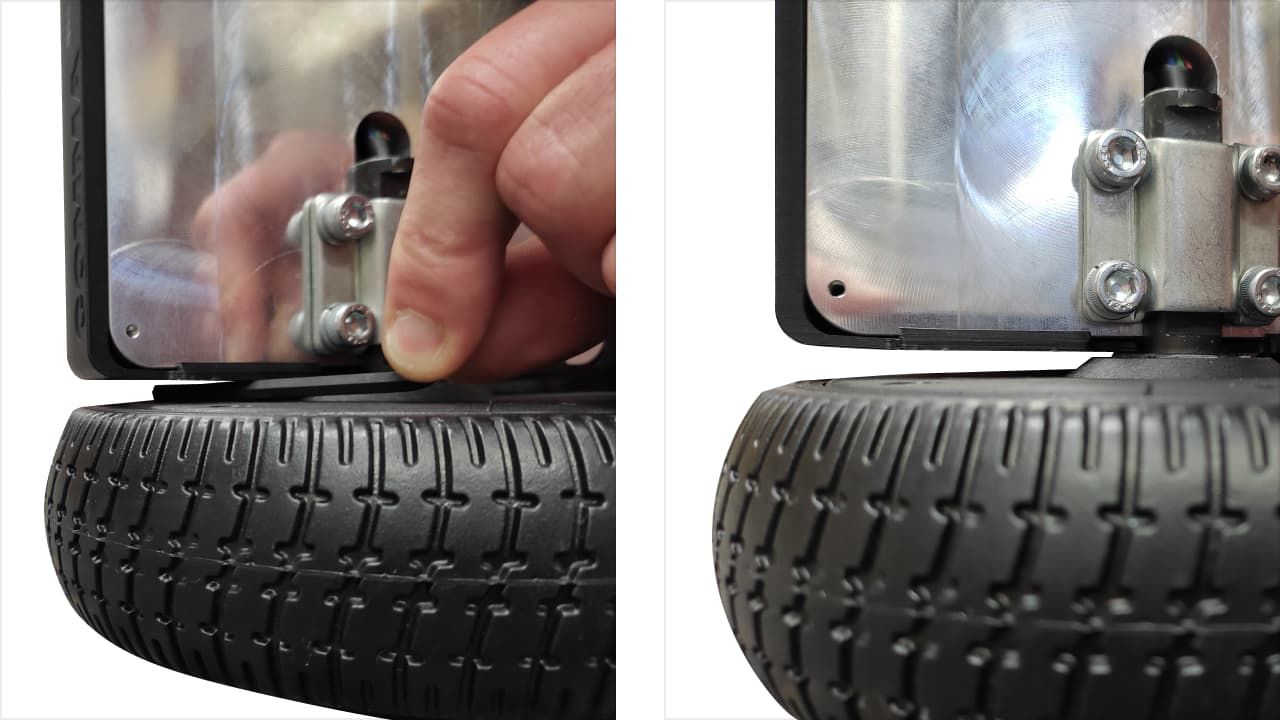
Attaching the rail: removing the plastic cover
Turn the comma body upside down to locate lid tabs.
Turn the comma body upright.
Push the plastic cover tabs from the bottom up.
Remove the second plastic cover by pulling it upwards.
Proceed with care as the power button and charging connector are wired to the cover, and are connected to the main board.
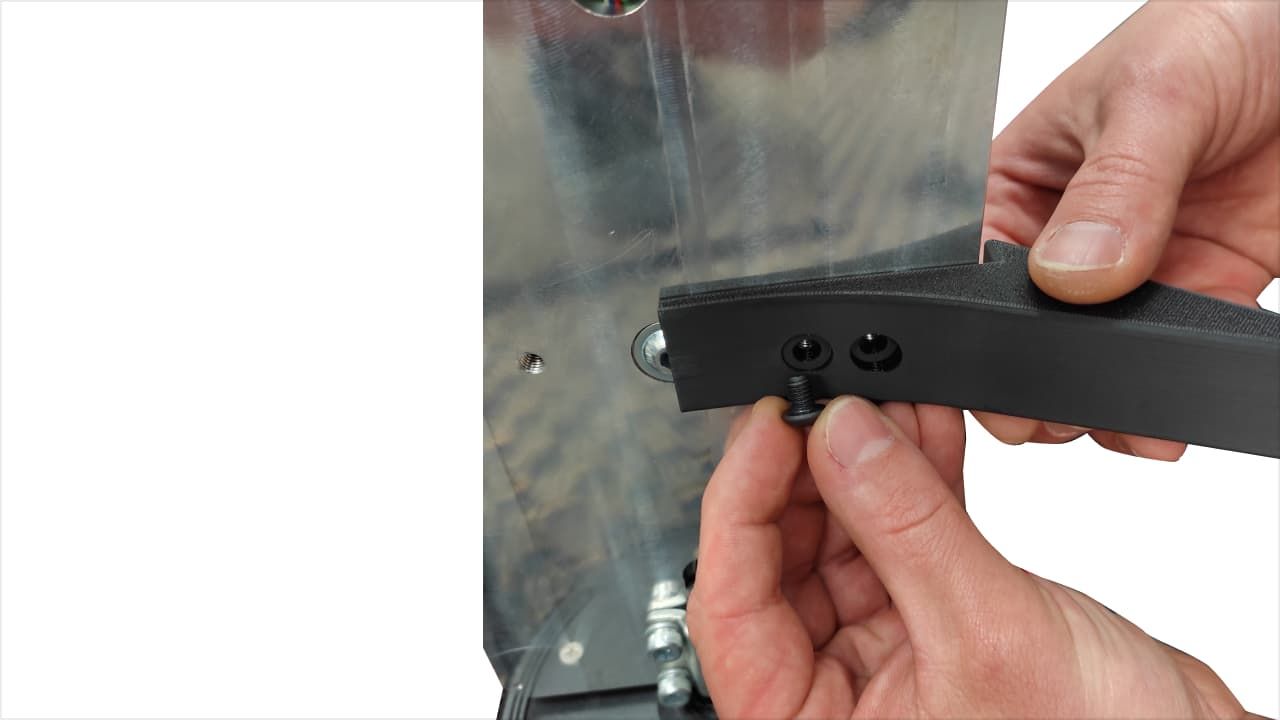
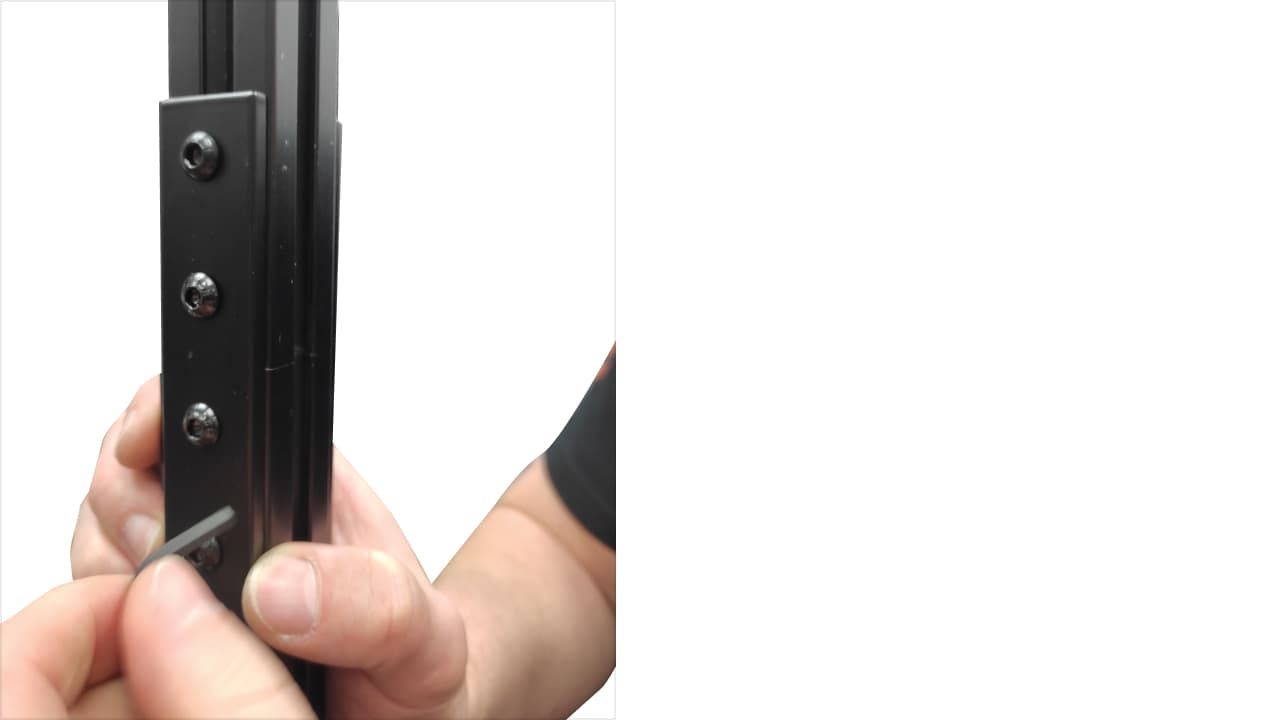
Attaching 1st rail to the comma body base
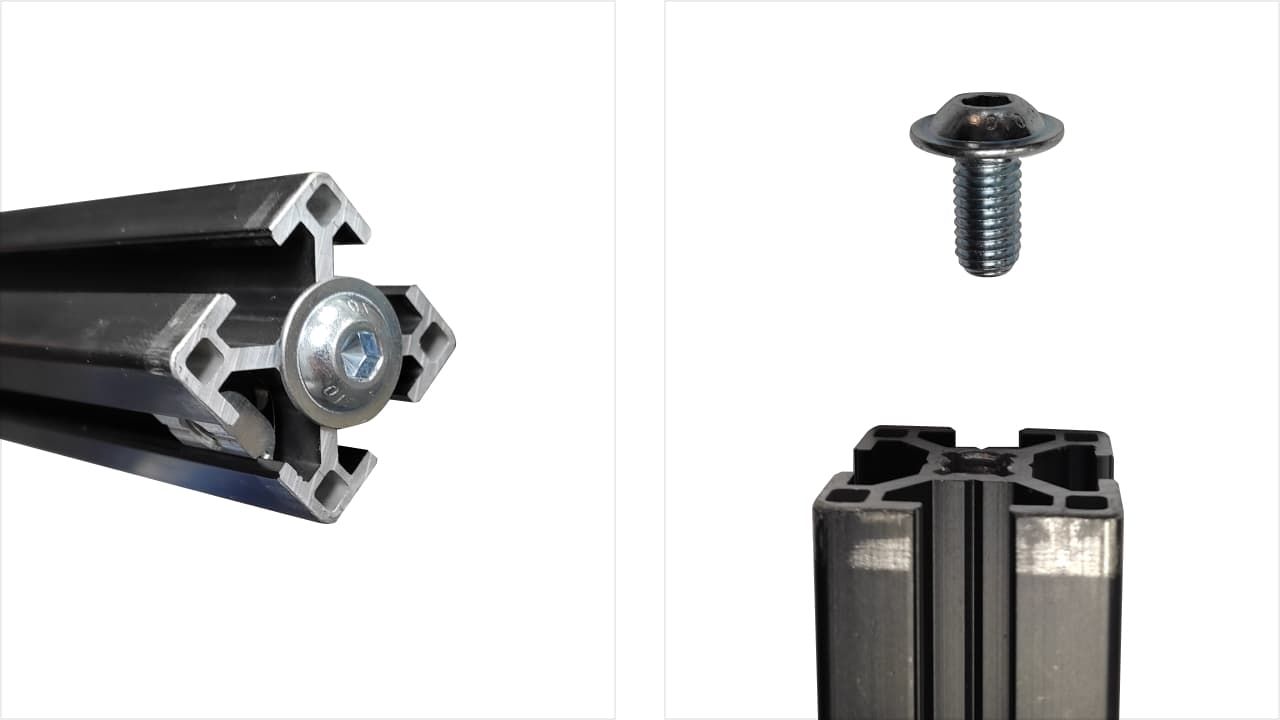
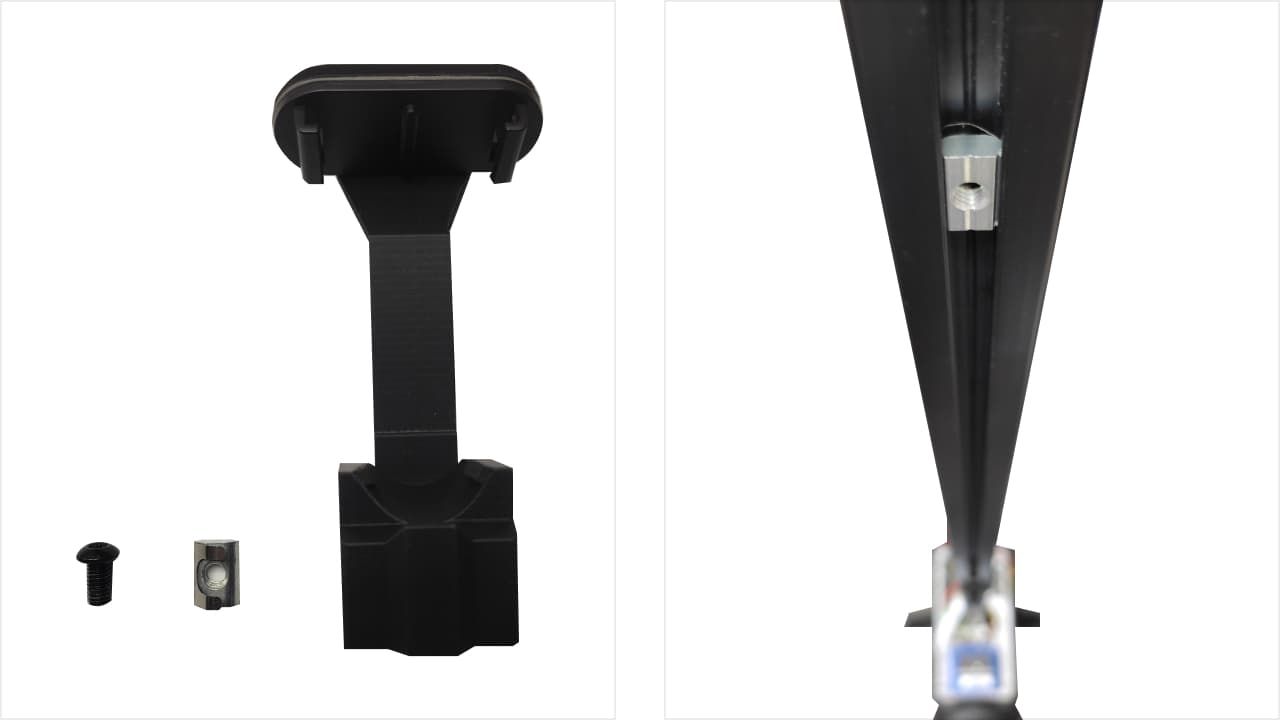
Take the threaded four slot rail with the flanged screw.
Remove the silver screw.
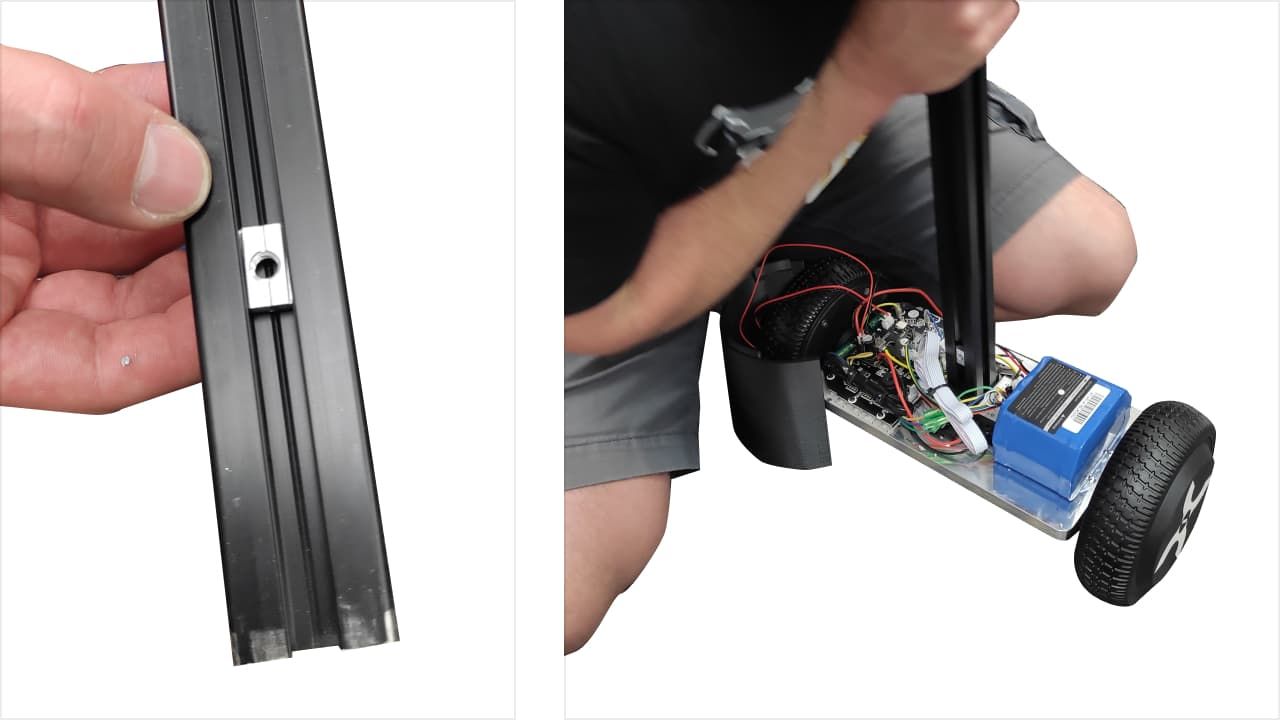
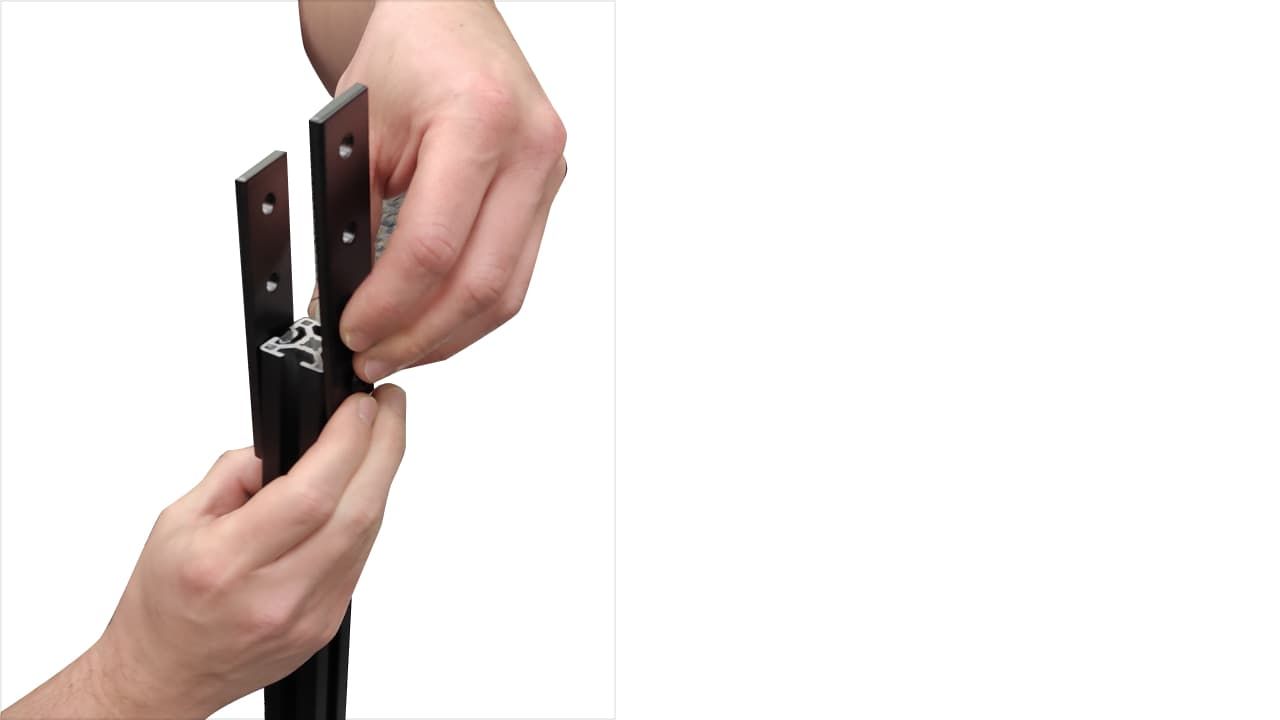
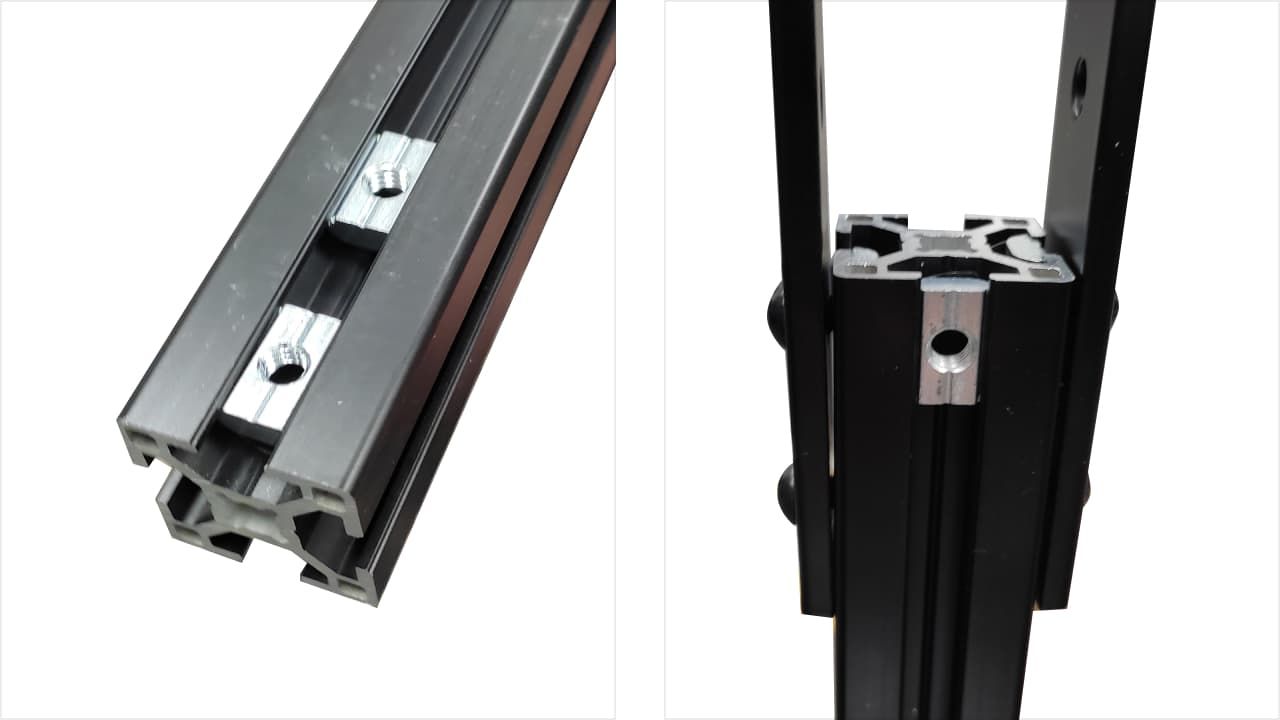
Make sure 2 spring-tab nuts are inserted in the slots, one from the opposite side. Place them 3 inches from the end of the rail.
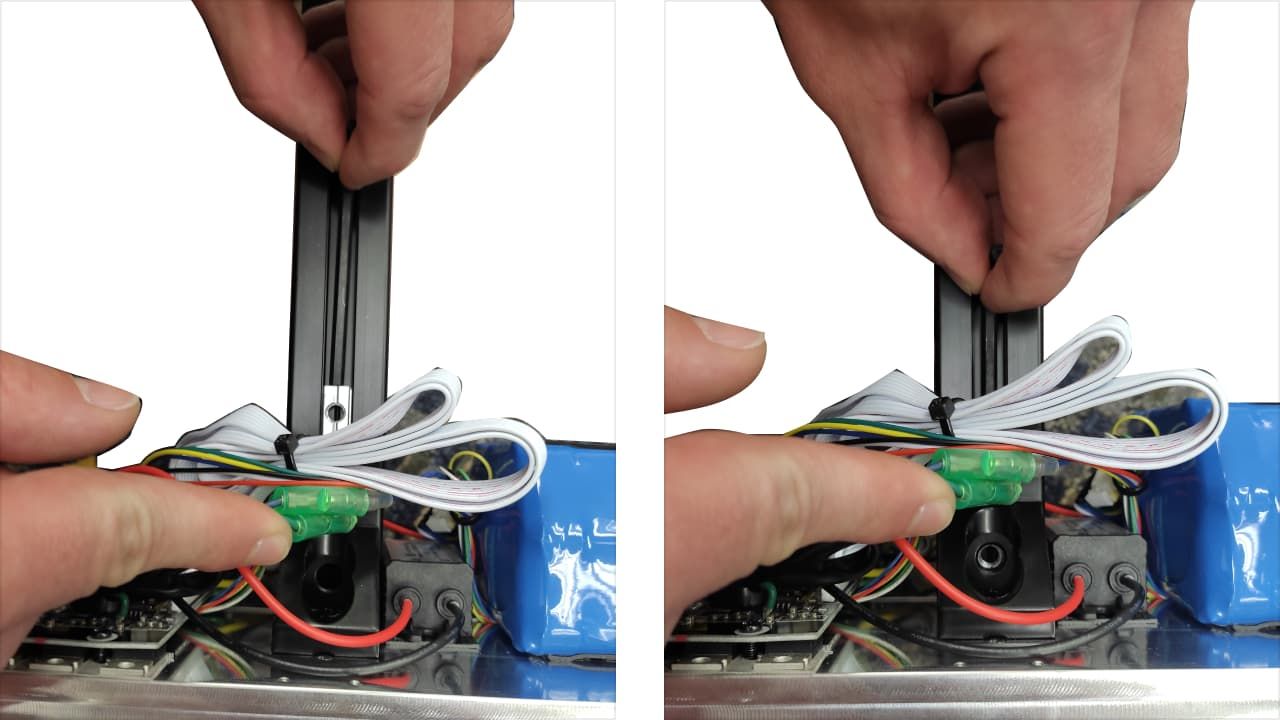
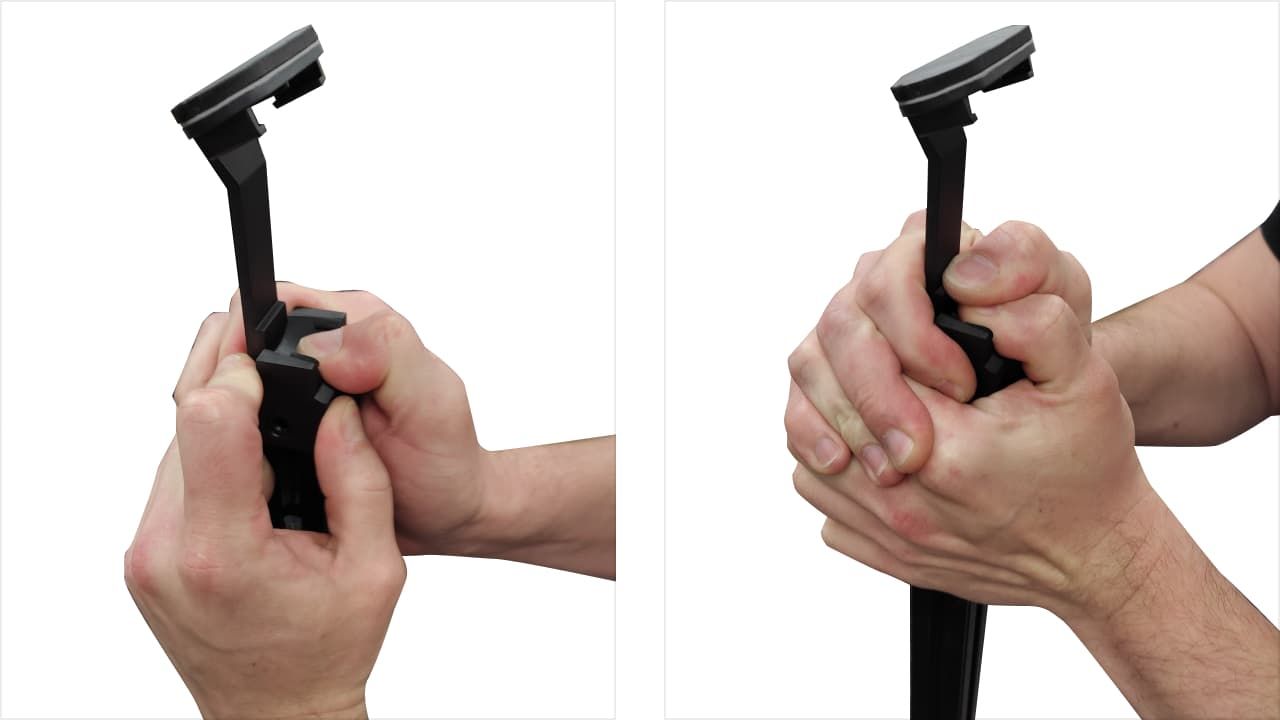
Insert the rail into the slot located in the center of the comma body aluminum base.
Press the rail in firmly with both hands applying high downward force.
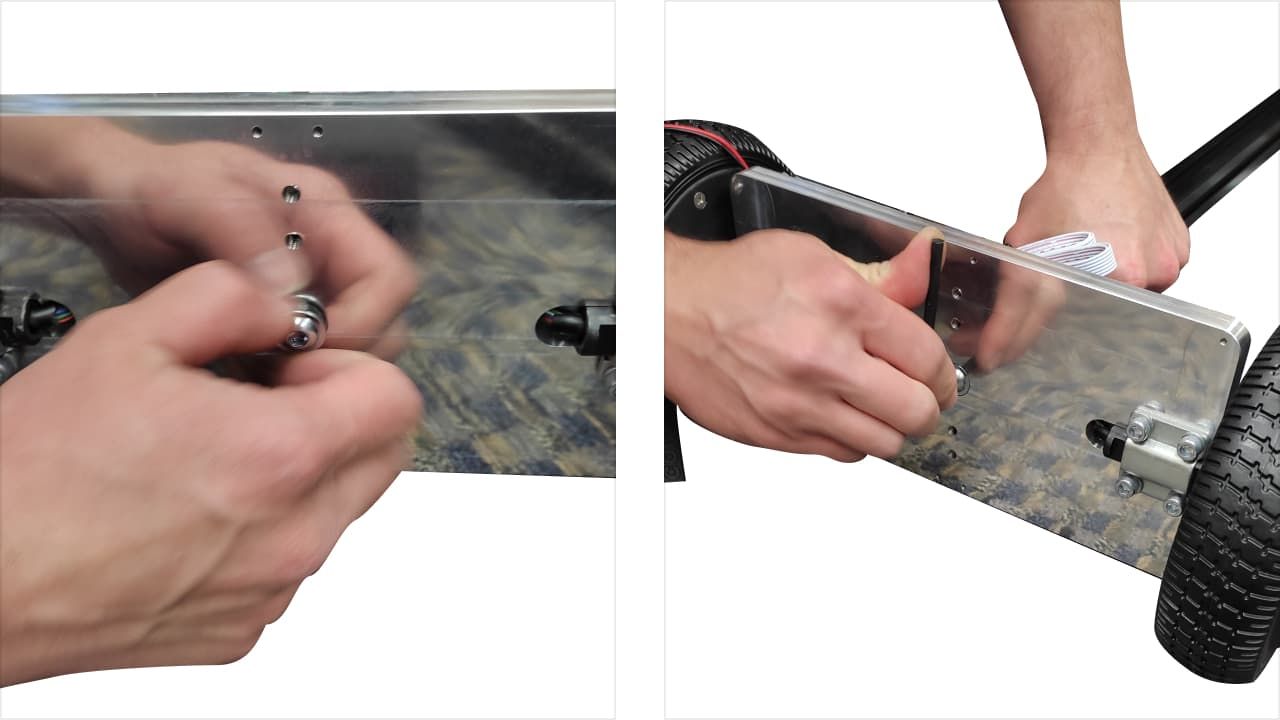
Use the flanged screw from the bottom side to align the rail with the base.
Use included 5mm allen key to tighten the screw.
Use a 4mm allen key to push the spring-tab nut in place.
Screw in screws in the angle blocks.
Attaching standing legs

Get two stands and a small bag with two short and two long M6 screws.
Attach both stands to the base first with the short screws and then with the long ones. DO NOT make it tight.
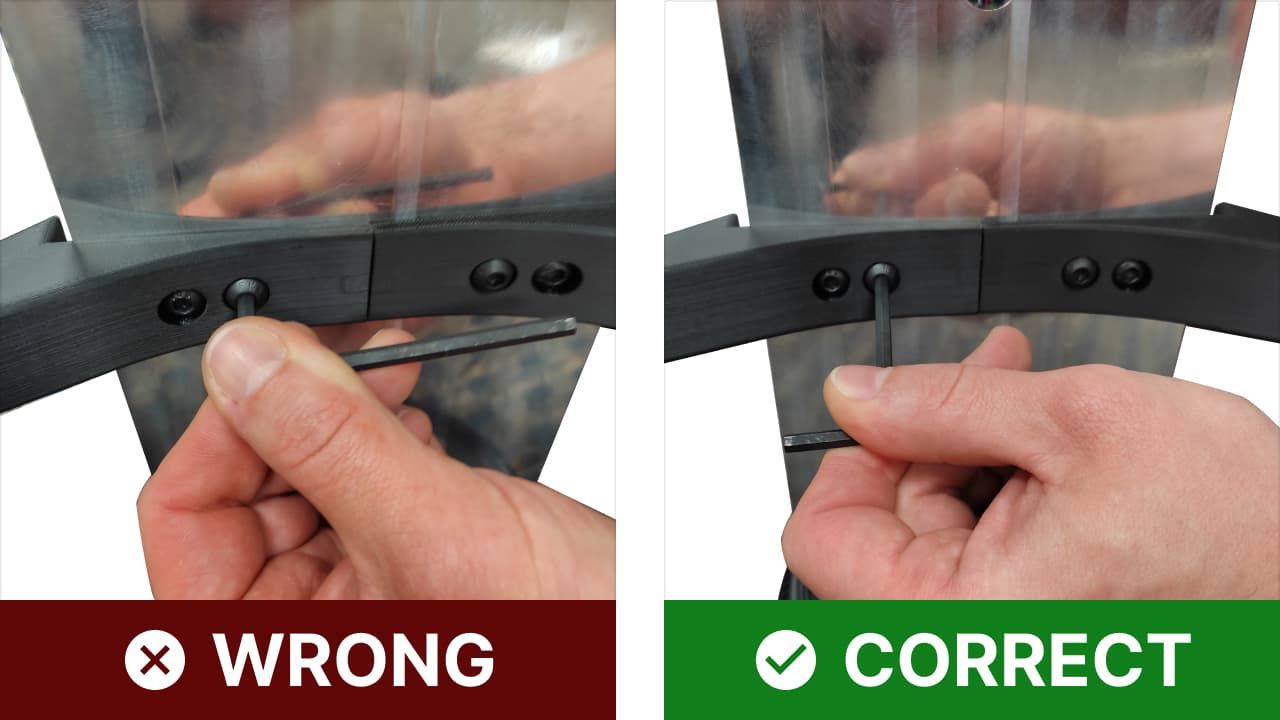
Align both stands to each other and tighten the screws. Use the long side of the allen key and two fingers to not over-tighten the screws!
Attaching 2nd part of the railing
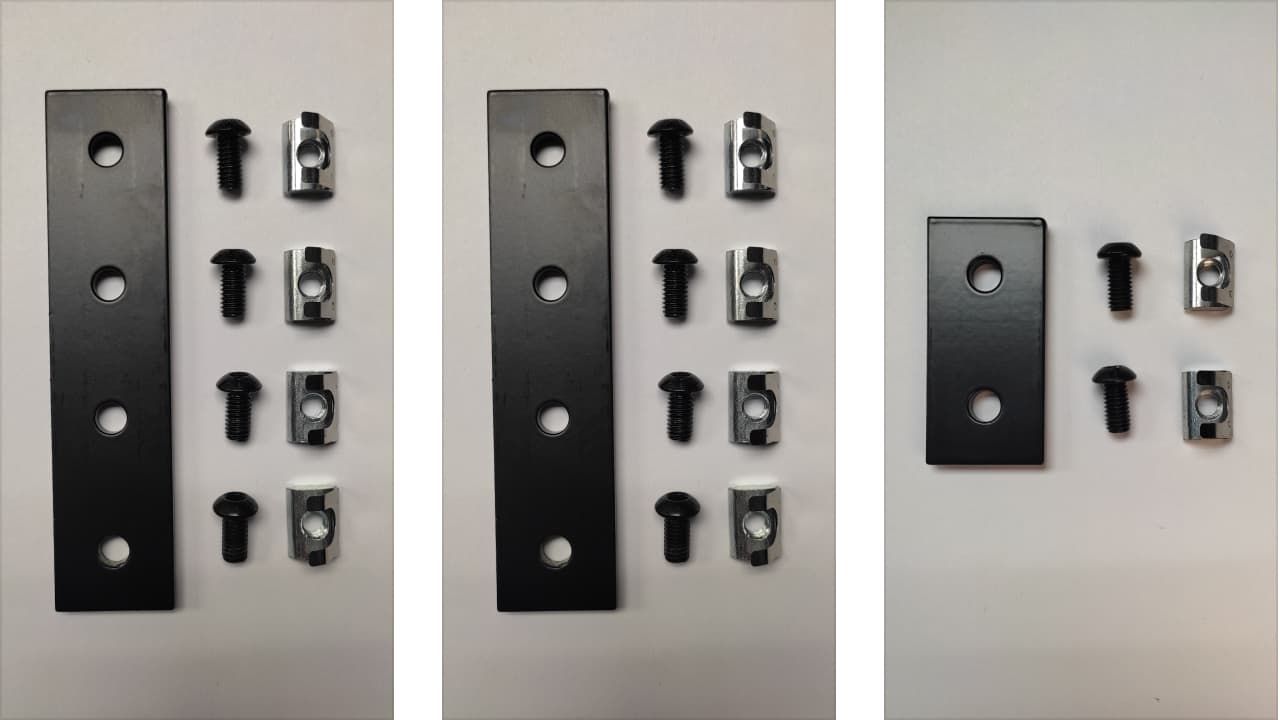
- 2x long connection plate
- 1x short connection plate
- 10x M6 screws
- 10x spring-tab nuts
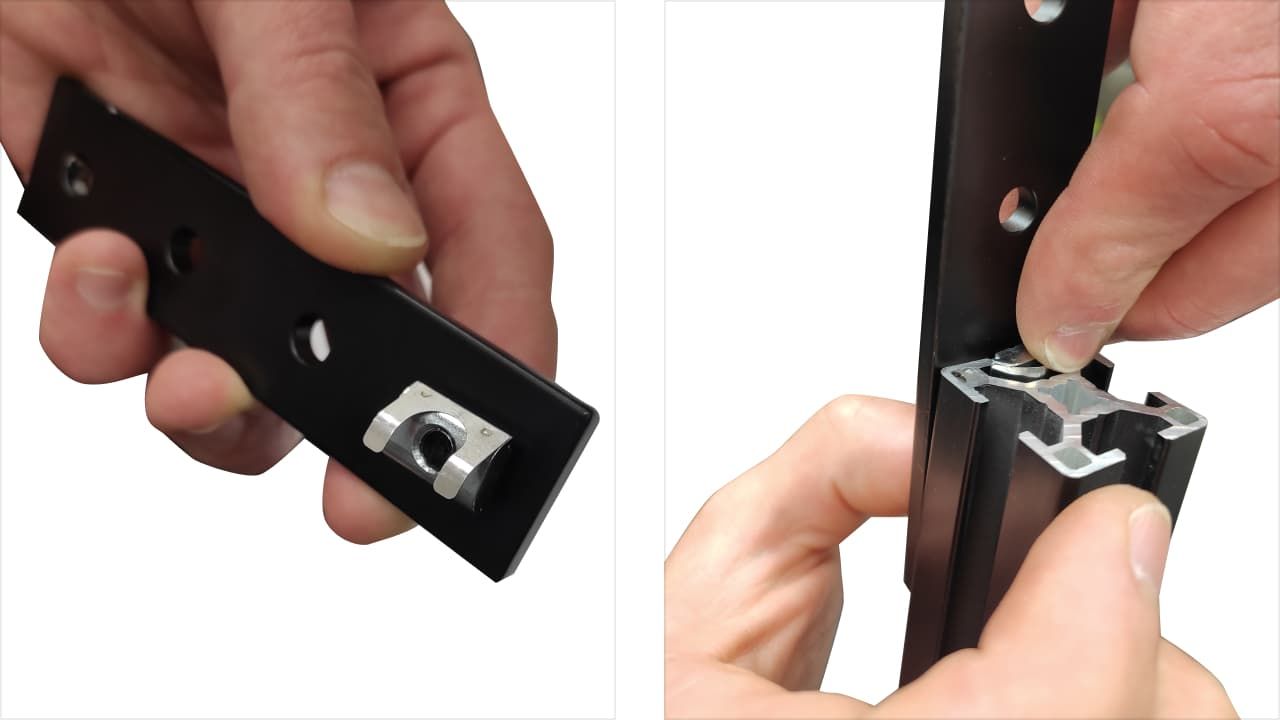
Attach two spring-tab nuts with the provided M6 screws but DO NOT tighten.
Insert one end of the bracket into the right side slot, while pushing on the spring tabs.
Repeat for the left side bracket.
DO NOT tighten the screws yet!
Place spring tab nuts in corresponding slots of the top rail. Two for the left and the right rail, and one for the back rail.
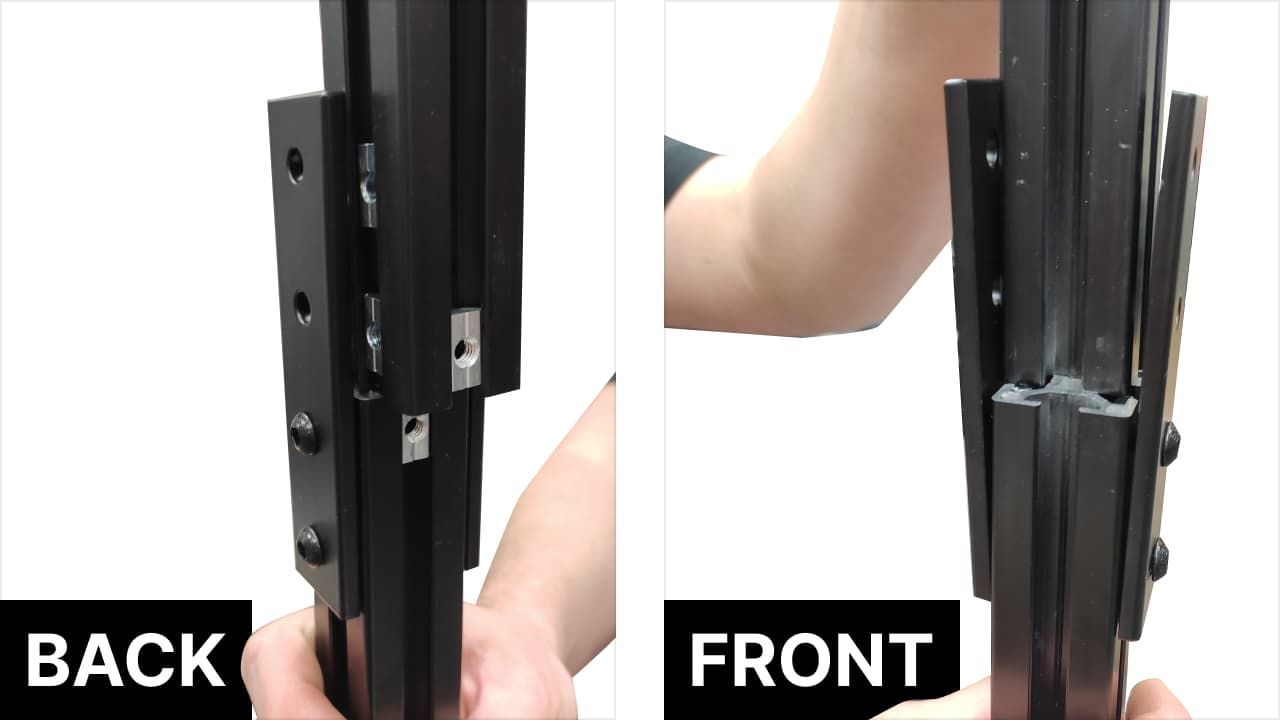
Place top rail onto the bottom rail.
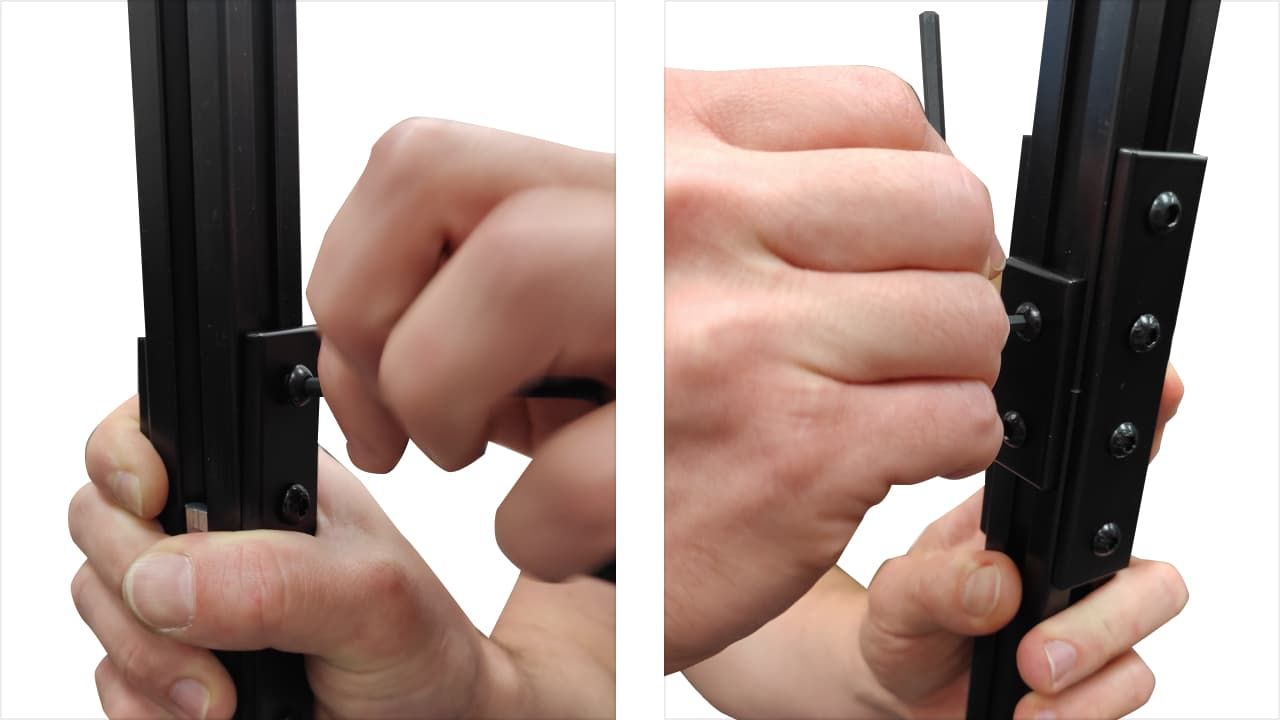
Attach with M6 long screws but DO NOT make it tight.
Align the left bracket visually in the middle of both rails.
Tighten the two bottom screws.
Repeat the same procedure for the right and center(only 1 bottom screw) brackets.
Align the top rail and make the top screw of the center short rail tight.
Tighten 2 top screws on the left and right brackets.
Attaching the comma three mount
Take comma three mount with the screw and spring-tab nut.
Slide in the spring-tab nut into the left rail, move 3 in away from the rail end.
Locate the hole on the mount, it should face the left side. Press in mount on the rail with both hands.

Use the allen key to position the spring-tab nut.
Tighten the screw with the long side of the allen key.
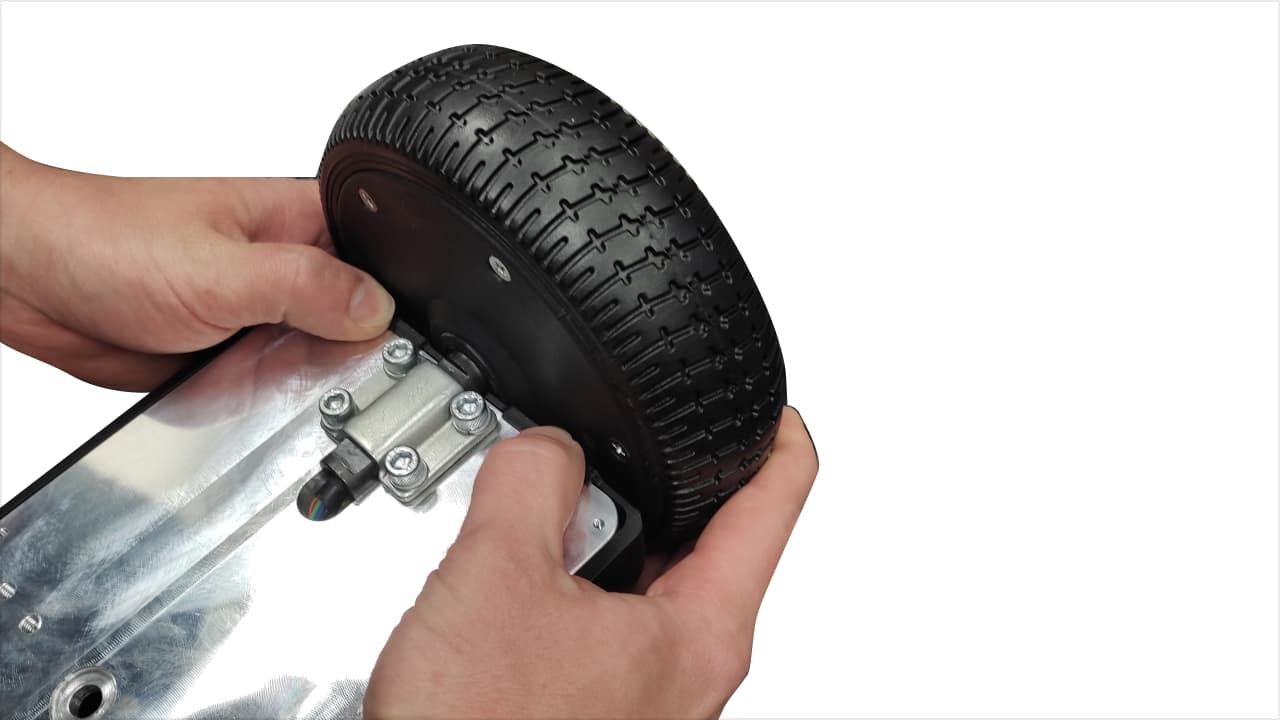
Attaching a comma three device
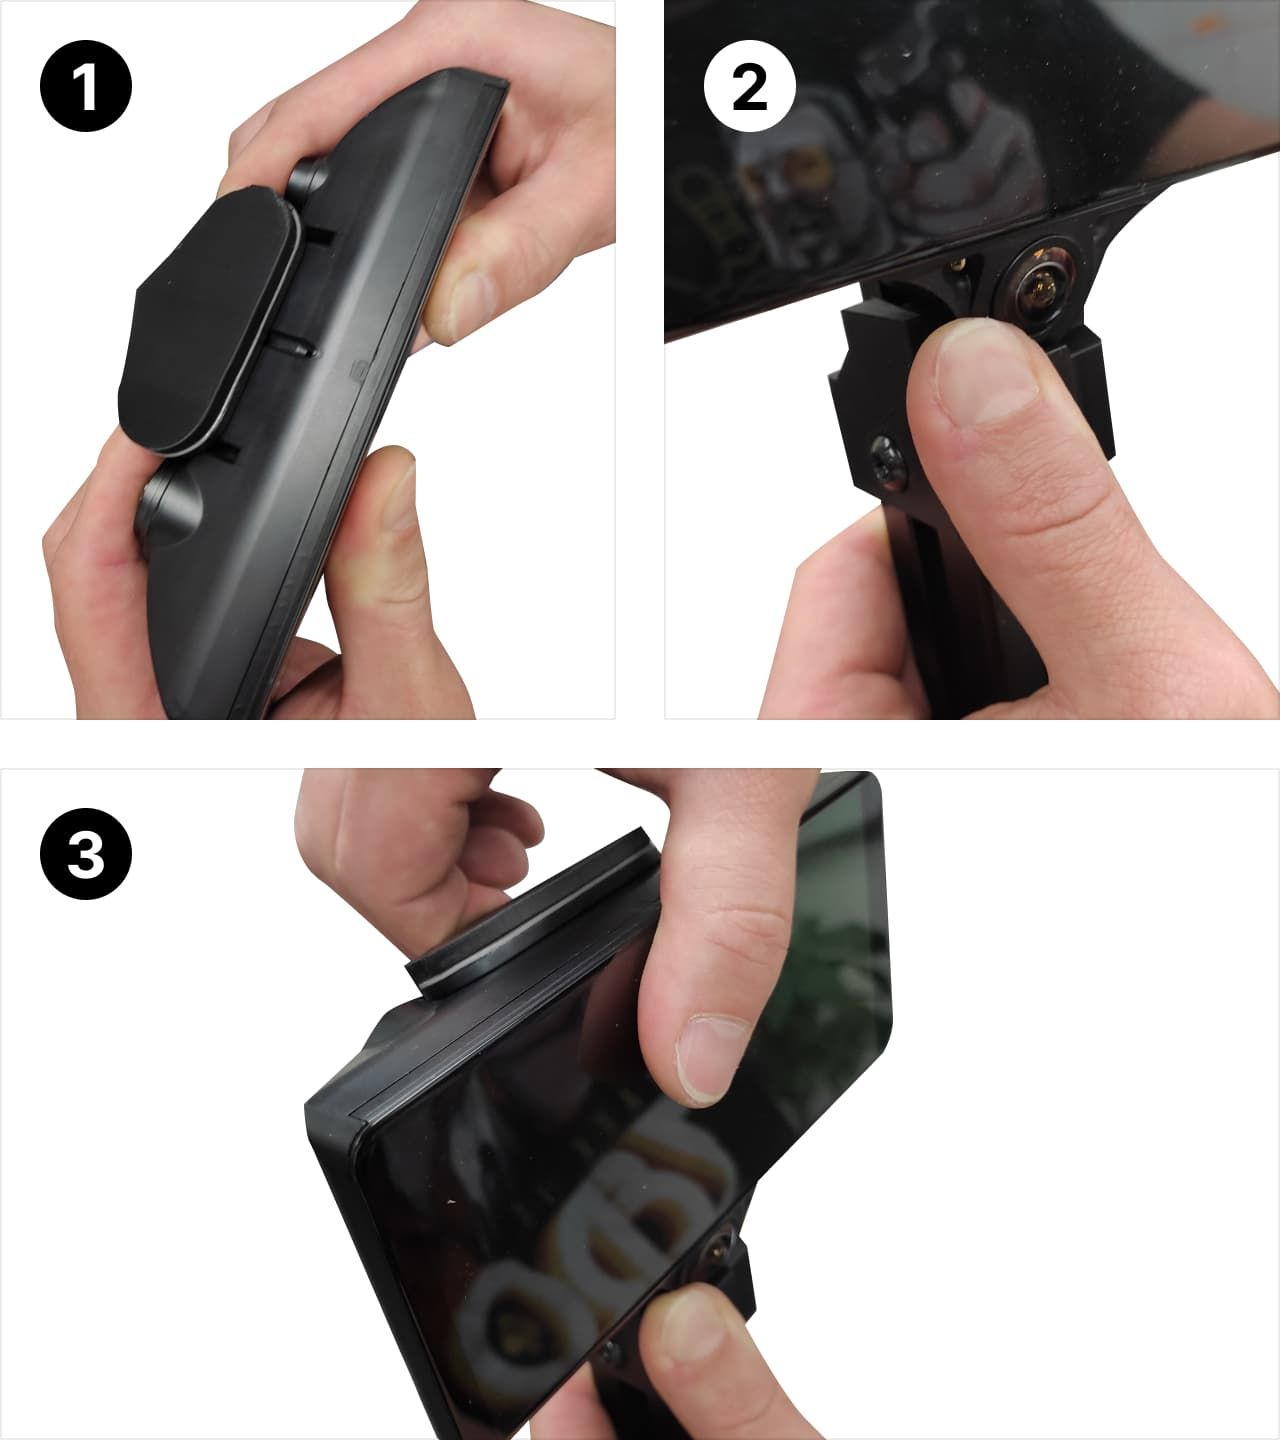
- Slide-in comma three halfway by pushing it with two fingers into the mount.
- Push slightly on the edge of the camera bump to move it in place.
- Push in comma three all the way into the mount.
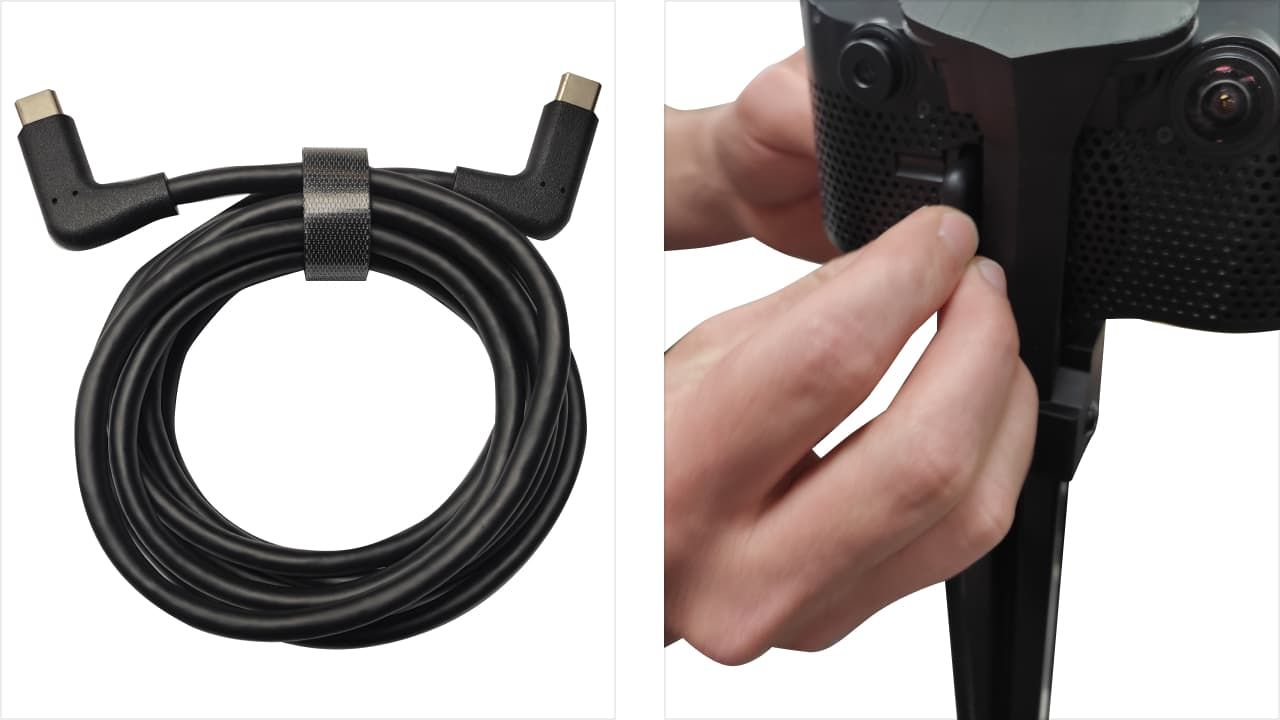
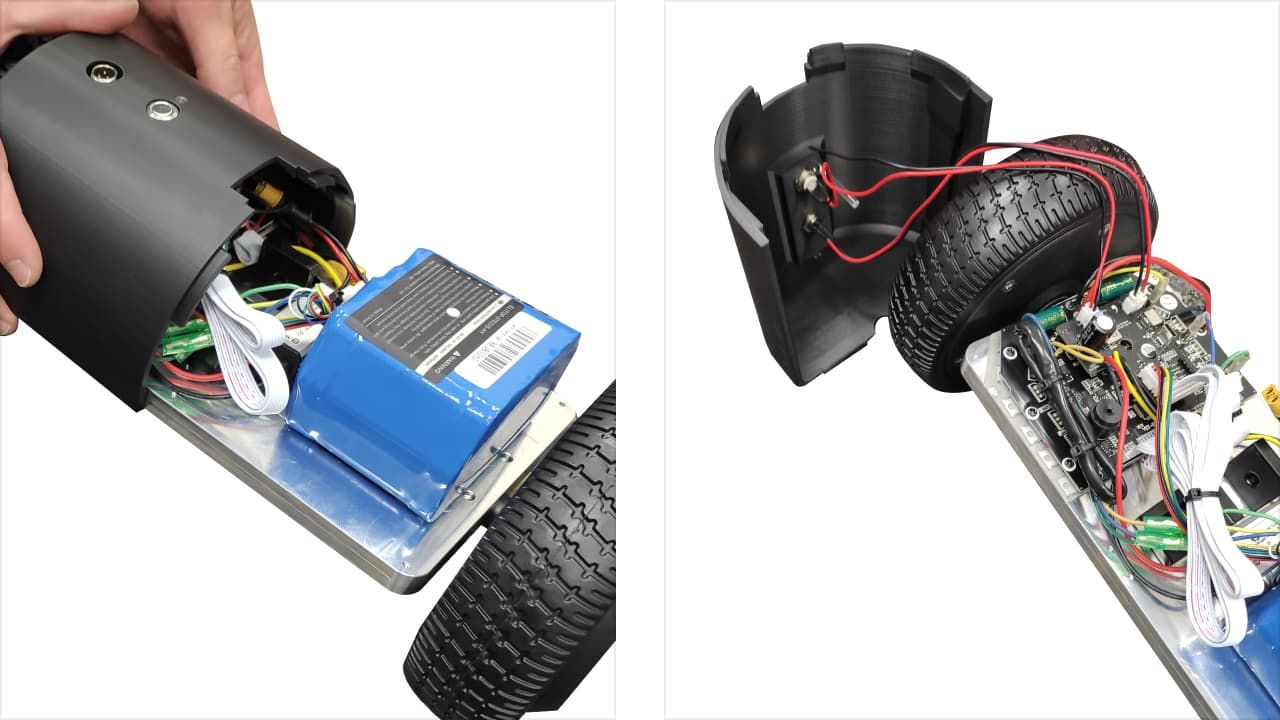
Remove cable wrap, discard.
Plug in the USB-C cable to the comma three.
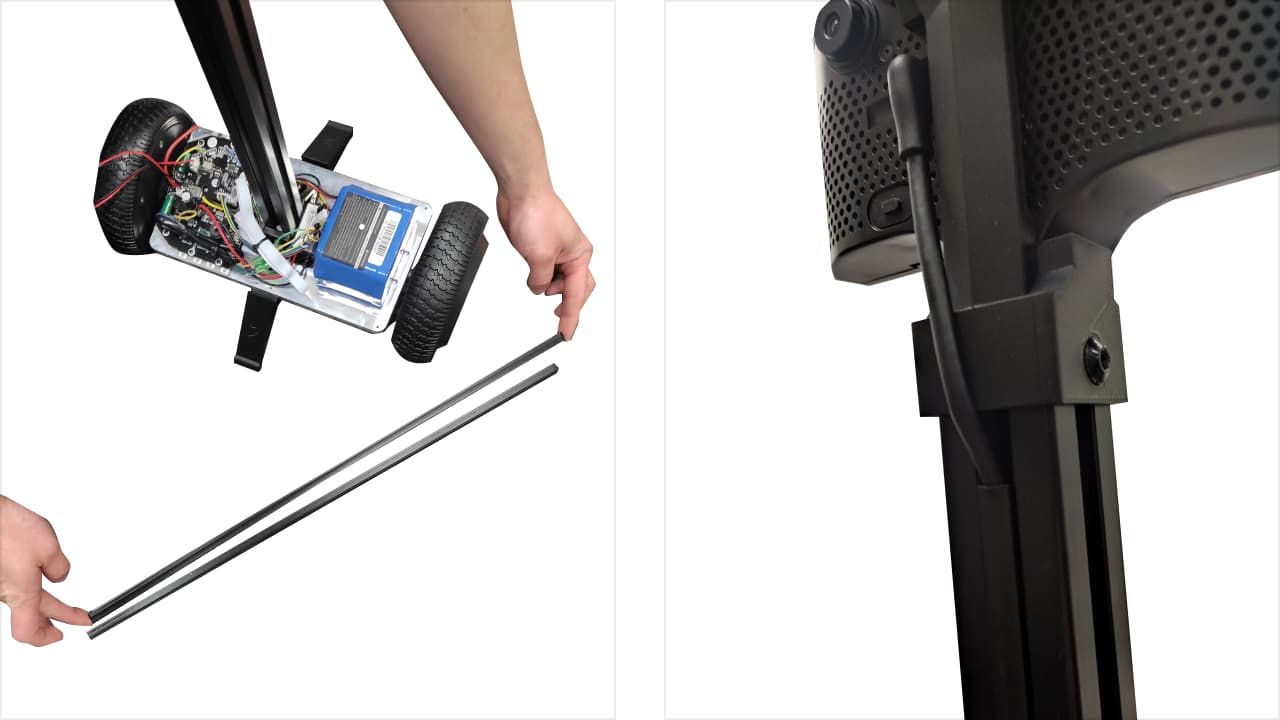
Take the long dust cover.
Place the USB-C cable into the slot and press in the dust cover.
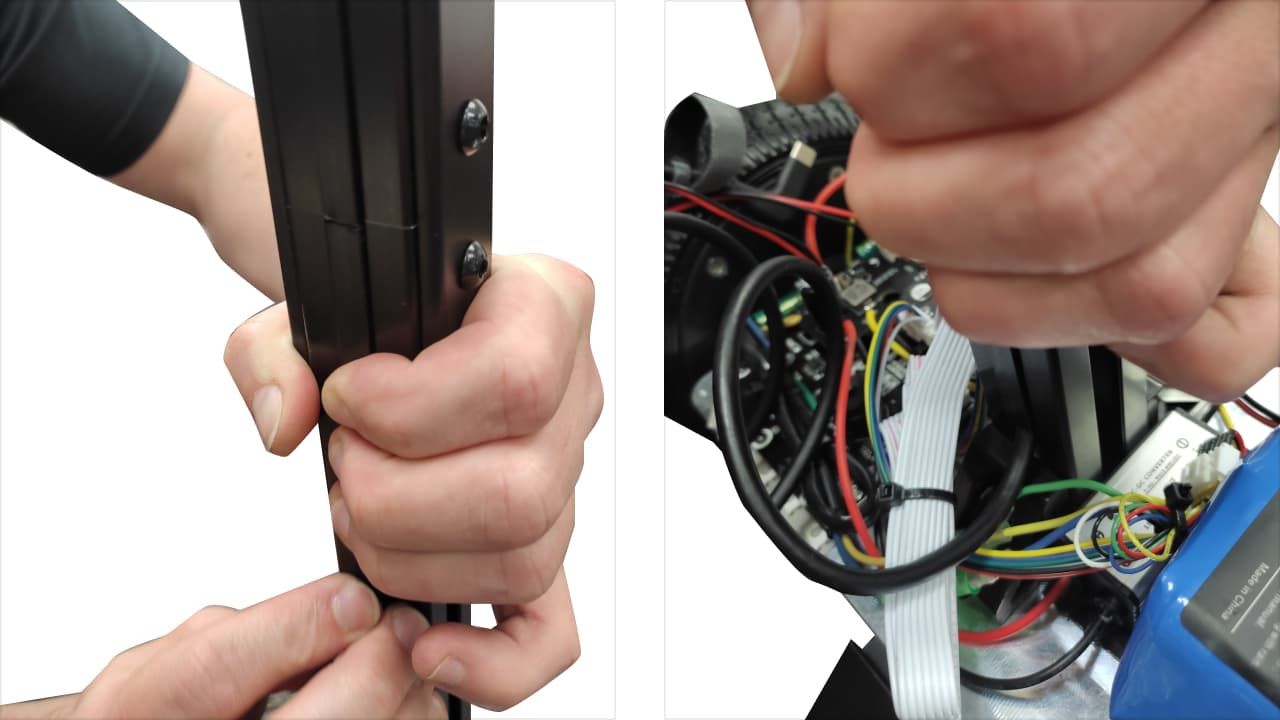
Take the short dust cover and continue through the bottom rail.
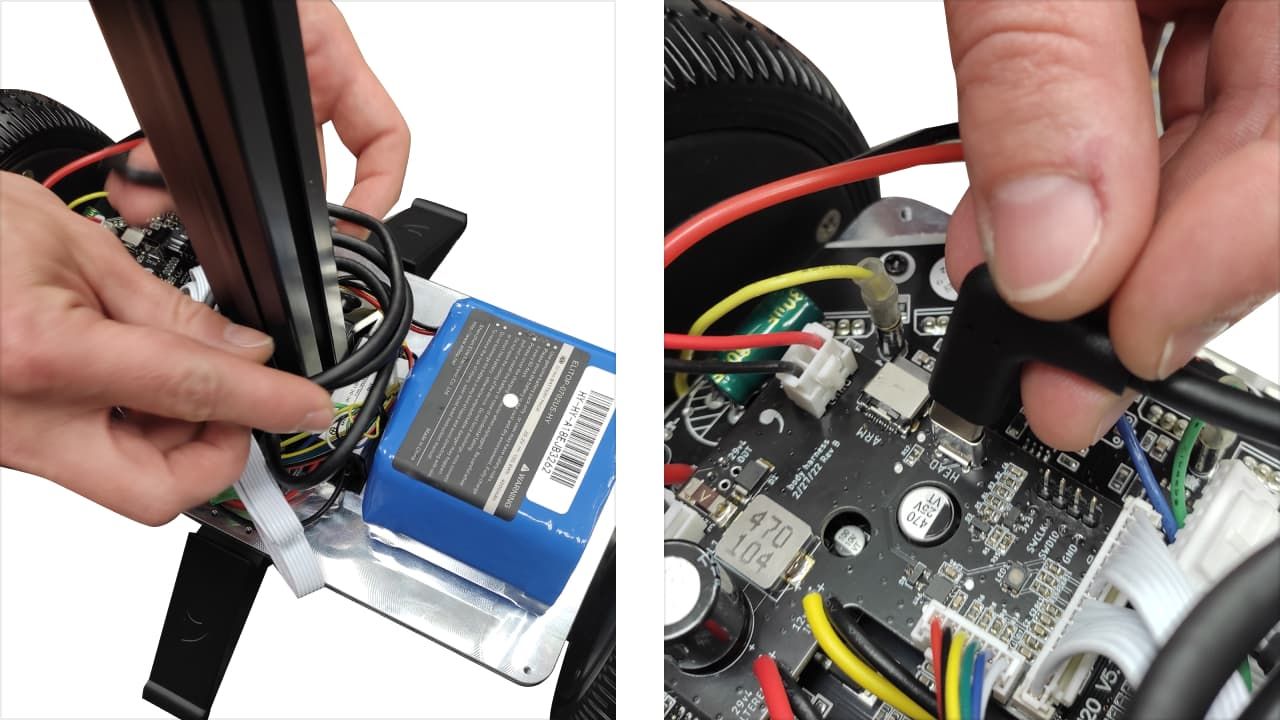
Wrap the USB-C cable around the railing 3 times.
Plug in the end of the USB-C cable into the OBD-C port marked “HEAD”.
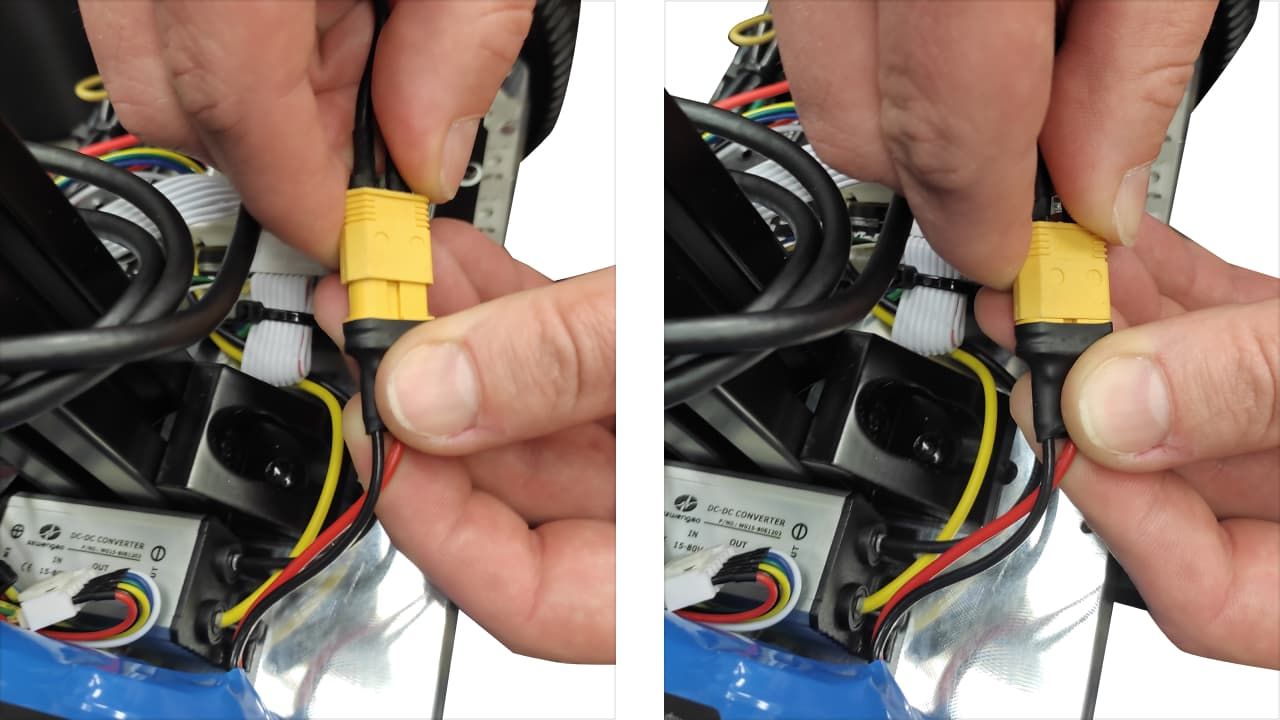
Plug in the yellow XT60 battery connector.
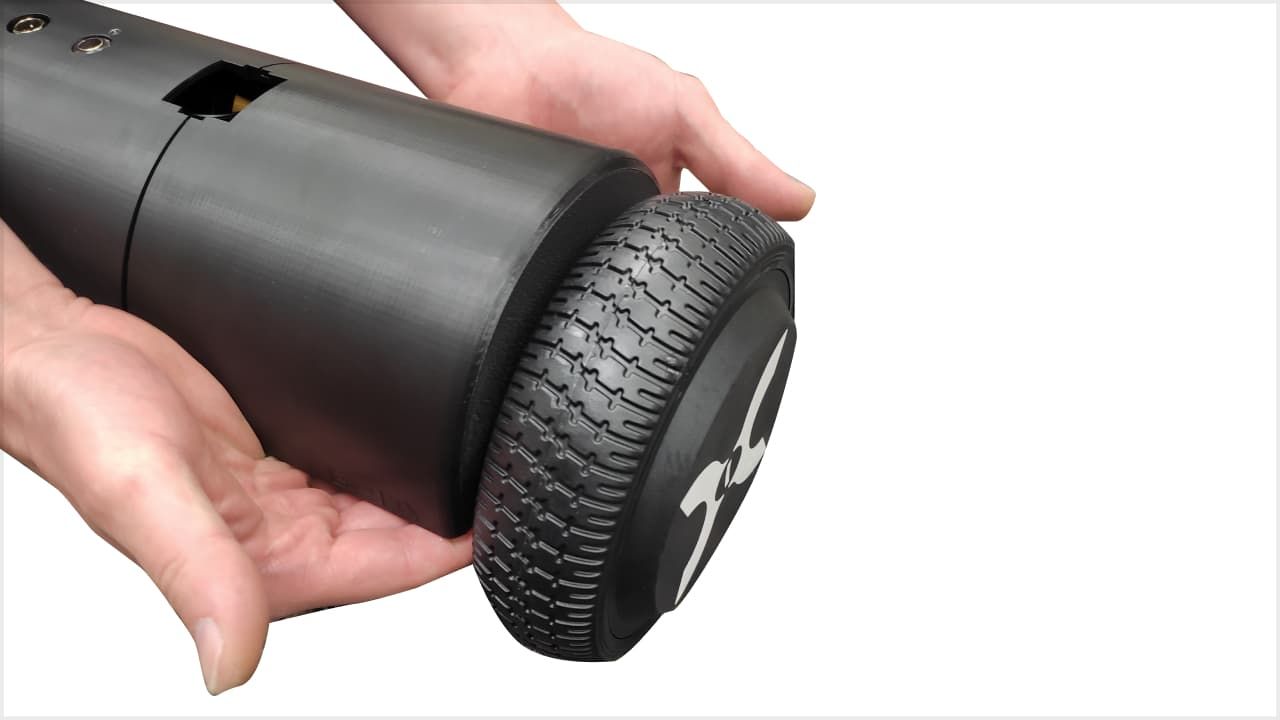
Attaching plastic cover to the comma body base
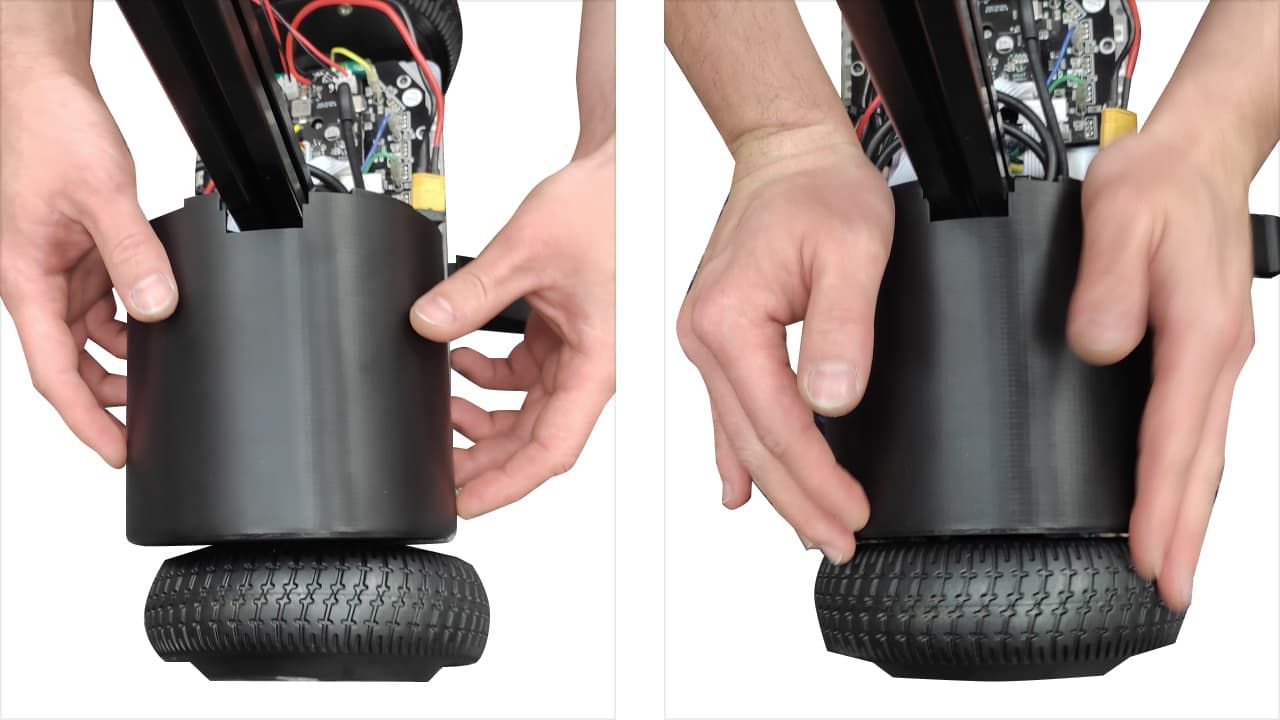
Place covers on top of the body base and press them in.
Move covers into each other with your fingers to close the gap between them.
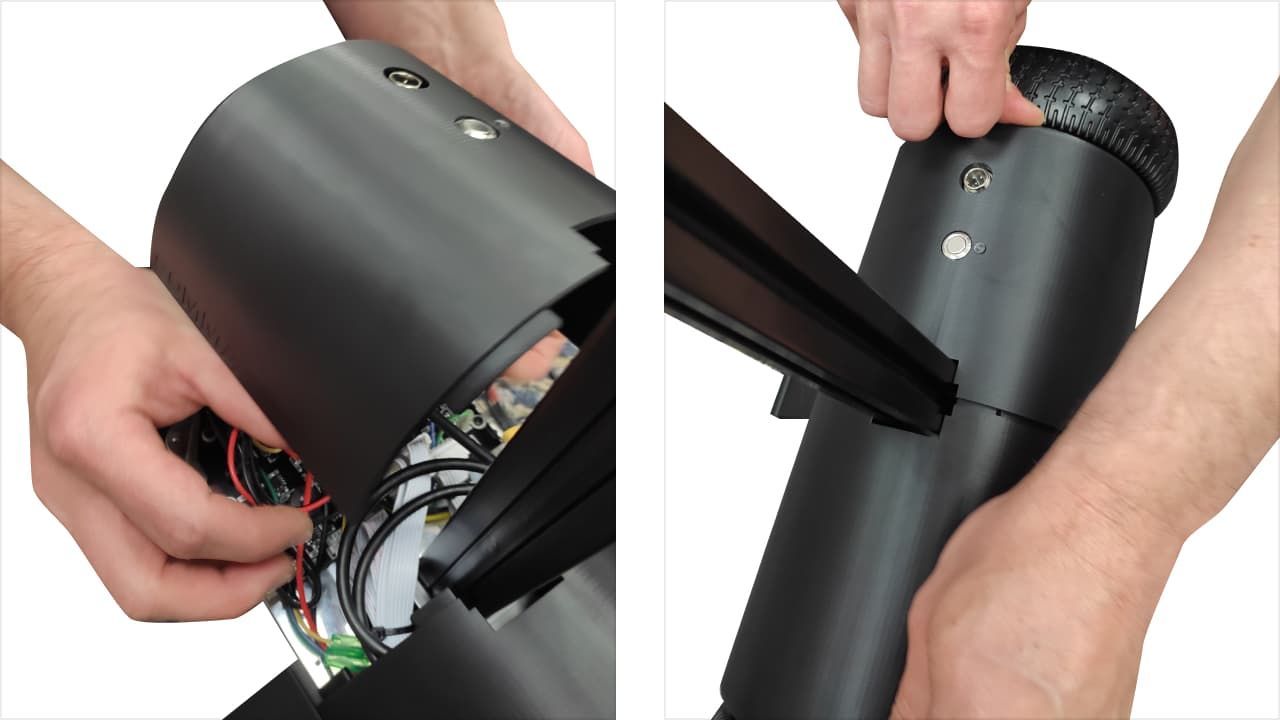
Put the body on a side.

Use 4 mm allen key to lock the tabs of both covers.
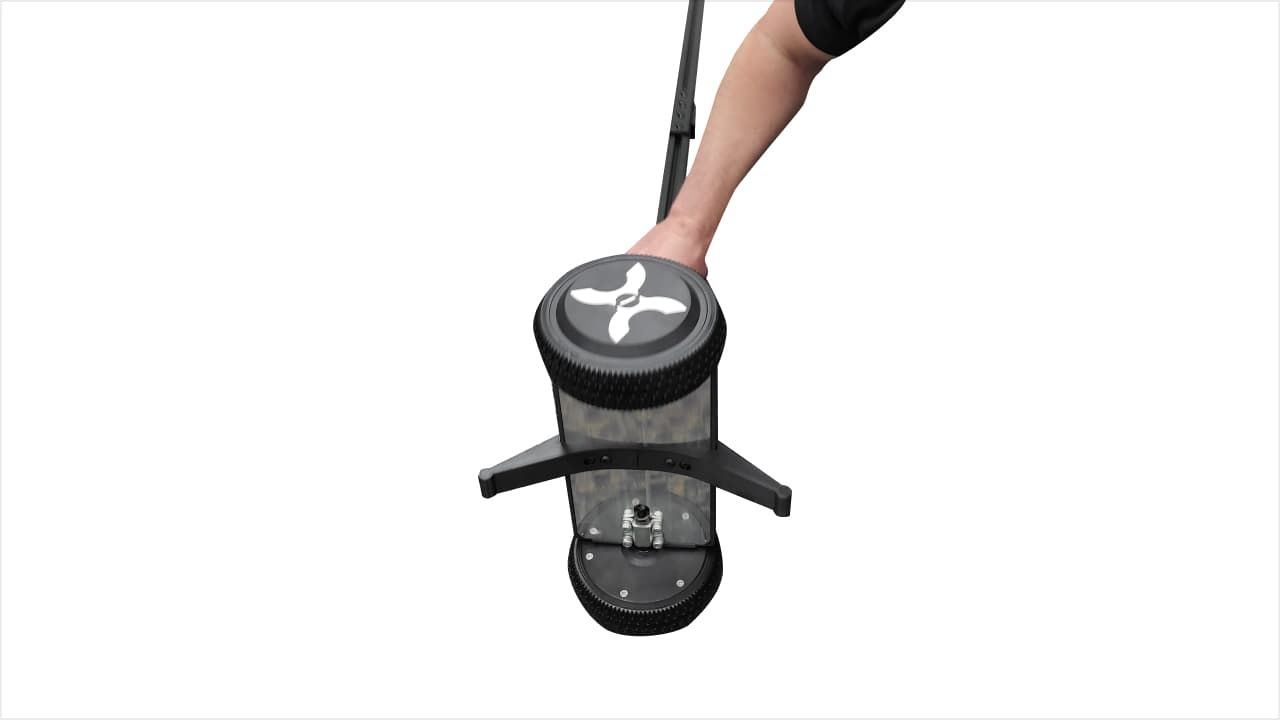
Initial boot

Press the button to turn the body on, the comma three will be powered on and ignition will be enabled (green LED).
To switch ignition on/off press the button. You will hear audible confirmation, and the green LED will turn on or off depending on the ignition state.
To turn the body off press and hold the button for 2 seconds. You will hear audible confirmation.
Blue LED means that the body receives CAN messages from a comma three.
Frequently asked questions

comma body is “the future of people.” You buy a comma body, buy a comma 3X (the head), attach the comma 3X to the body, and watch it come to life.
We believe that in order to solve AI, for most people’s definition, you must be embedded in the real world. We define AI as a machine that can do every task at least as well as a human. And in order to do human tasks, it helps a lot to have a human like body. The comma body is the beginning of that journey.
Today it’s a mobile platform for the comma 3X, but we will be building a knee and arms for it. Like everything we do, we try to distill the problem down to its essence, so unlike some companies, we aren’t focused on the humanoid shape. Wheels are a fine form of locomotion for cooking and cleaning, the dream tasks of the comma body. Two arms, a knee, and a comma 3X should complete a comma person (sold separately, knee and arm coming in 2023).
The comma body runs openpilot! From openpilot's perspective, the comma body is a car. It runs the same camera and logging software, so we'll be able to learn from the fleet of bodies in the same way we learn from our fleet of cars.
At launch, the software will balance the body (using the same localizer as the car!) and allow you to drive it around via web interface. Shortly we’ll add video streaming to that web interface, allowing you to drive your body outside line of sight. We’d also like to add a VR app to drive the body from a first person view, this will be needed by the time we ship the arms.
Once we start getting data back from our body fleet, we can train models. The first model we will train (jointly with the driving model!) is a posenet, allowing inside out position tracking. When this model is shipped, the localizer will change from 3-DoF to 6-DoF. And once the dead reckoning is similar quality to what we have on the cars, adding a SLAM system will be very simple to allow drift free localization in your environment.
Have a question or want to learn more? There are thousands of knowledgeable community members on the Discord.
Join our DiscordCheck out the code behind the comma 3X and openpilot. Review, fork, and contribute to the open source ecosystem.
Visit our GitHub